
It is surprising how something as simple and mundane as watermarking images can cause such headache amongst beginner photographers. Everyone gets told, “watermark your images”, but hardly anyone gets told how to. Thankfully programmes such as Lightroom make this easy, but it is as easy in Photoshop. The basic idea of a watermark is a logo or piece of text that is embedded in the actual image so that copyright of the image is ensured. It also makes theft of the image rather difficult if the watermark has been placed affectively. If you are using Lightoom the easiest way is to export the image with a tick in the box that indicates that the image should be watermarked. Using Lightoom you have the option of either a
simple piece of text or of using a graphic that you have created. The
advantage of using Lightroom is that once you have made all your choices
and created some templates, an entire export of images can be
watermarked. If you are wanting something a little more complex than a
text watermark the an image can often be more eye‐ catching. My
watermark for the past few years has looked like this:

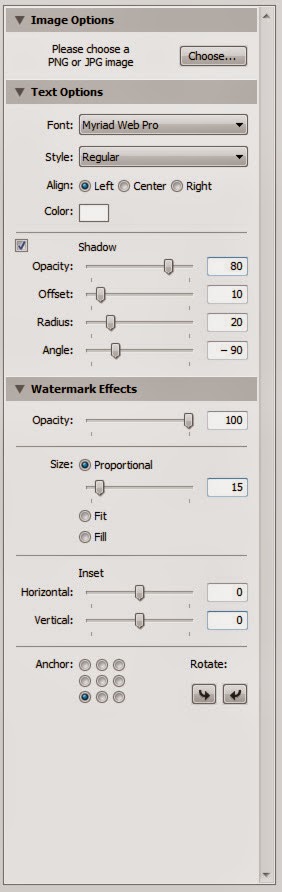
 To create the watermark I scanned in a copy of my signature and cleaned up the look of the ink by blurring and then sharpening the image. Once this had been done it was fairly straightforward to create a selection based on the signature so that the colour of the signature could be changed at will (you can also turn the selection into a mask). Adding a drop shadow and bevel via the layer style dialogue gives the signature a little more 3‐ dimensionality.
The important part comes with saving the image. Here the layer with the signature must be separated from the background layer and the background layer deleted so that what you have is the signature on an invisible base (see image). Then save the image as a .png file rather than as a jpeg file. Png files have a transparent layer that allows them to have text and other images appear through the actual dimensions of the image (like the camera images in this issue’s ‘In the News’). Now, in Lightroom choose the graphic option and simply select the .png file that you have saved your signature to. Where you place the watermark is now an important consideration. A number of photographers opt to place the watermark as large as possible so that it makes copying impossible (Bence Mate has a watermark that covers the entire surface area of the image). Other photographers opt for a small unobtrusive watermark that doesn’t interfere with the image at all. I personally fall into the second camp.
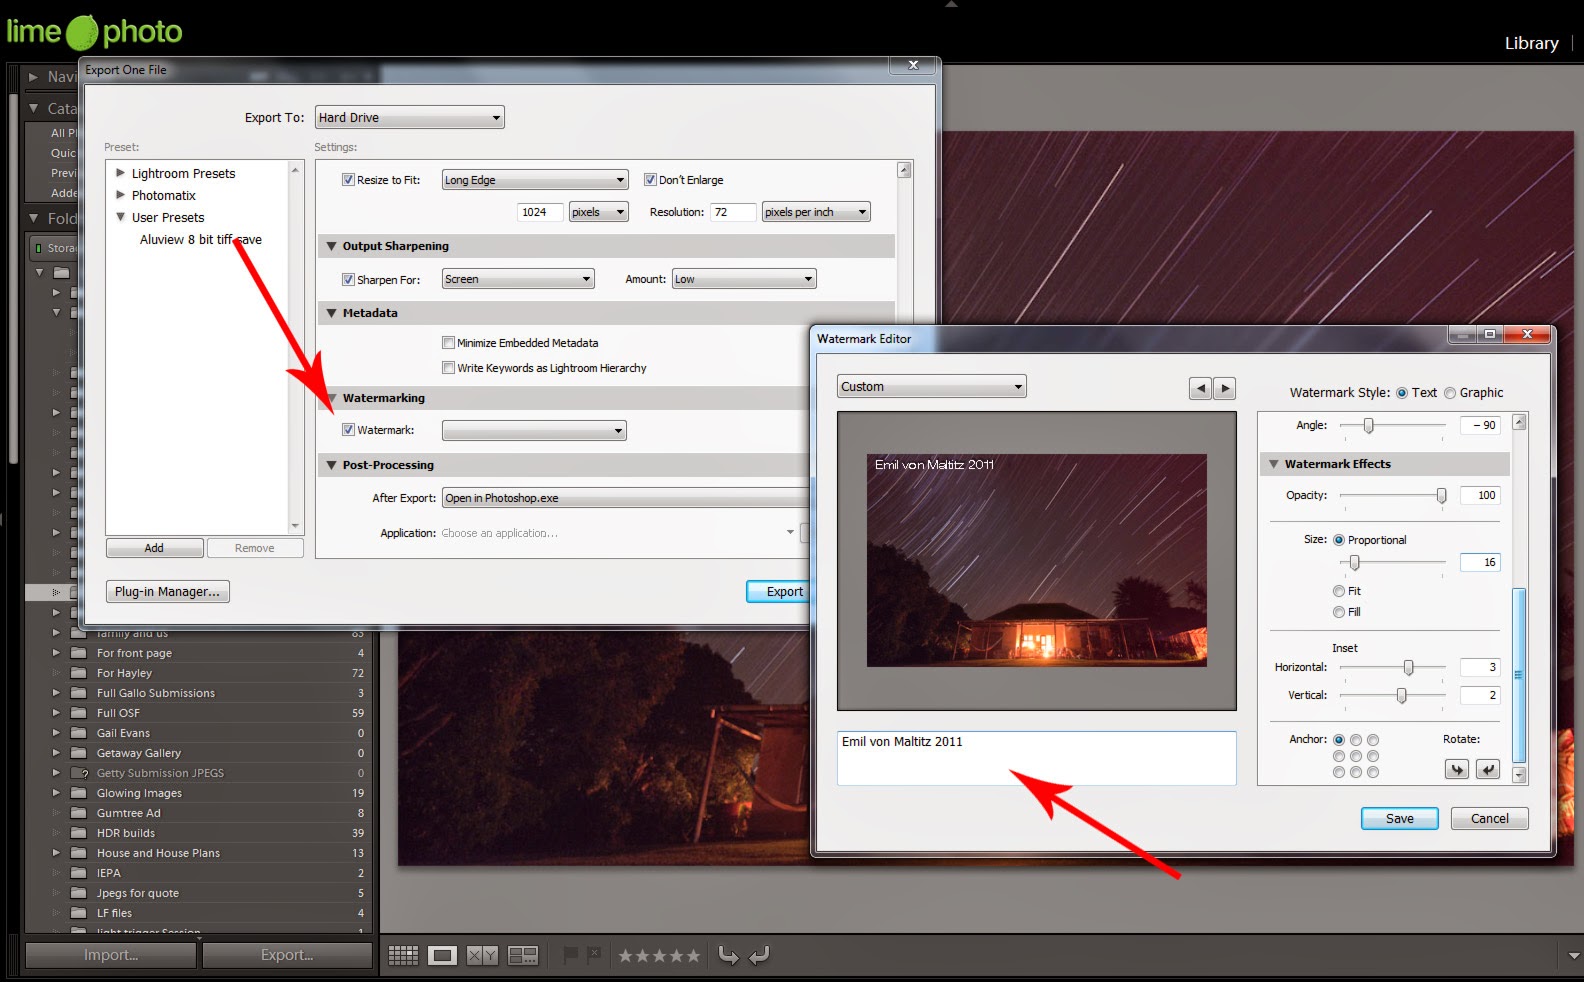
My reasons revolve around the nature of web‐ browsing. When an image is difficult to see, the viewer often moves on from the image quite quickly. As a photographer I want people to look at my images for as long as possible, if at all possible for them to return to look at the same images again. Having a watermark that obstructs viewing frustrates viewers, and potentially clients.
The downside to small watermarks is that the image can easily be copied and altered to remove the watermark. There is no effective defence against this. My website even stops the right-clicking of images, but a simple screen grab and the image is copied regardless (I have found images of mine on other websites that have been used without my permission, are credited to a different person, and yet still have my watermark very plainly evident in them). The best defense is to meticulously add metadata, setting the camera to record copyright and creating a watermark that gives more information than just the name.
Your photographs are your art. It makes sense to sign your name and announce that they are yours and yours alone.
No comments:
Post a Comment