

One of the strongest editing aspects of Photoshop is the way in which it enables layer based non-destructive editing. All the other finery and frippery of the programme is essentially just that: nice to have add-ons but nonessential. Even the impressive features like HDR blending and panoramic stitching can be done manually if you understand how to use layers and how to make selections. Without creating selections all that Photoshop can do is apply global changes to images. By creating selections photographers are truly able to process their images in new and exciting ways.
In a nutshell, a selection is a portion of the image that the photographer chooses or selects in order to apply an edit, cut, paste or even just fiddle with on a pixel level (like those appallingly bad greeting cards with unnaturally enormous-eyed, sad-looking kittens). We have various tools available for creating selections, of which the most basic are: Marquee (M), Lasso (L) and Magic Wand (W). All three are found on the tool bar and have sub tools (Marquee can be rectangular or oval, Lasso can be freehand, polygonal or magnetic, and Magic Wand can also be a quick selection tool). Each of these tools enable the photographer to drag an icon or target around the image and thereby select pixels. You can quickly select the sub-tools by holding shift and hitting the shortcuts keys (given in brackets above).
 | |
| Click on the image to see the enlarged version with legible text |
The Marquee tool is the easiest to use. Simply select the Tool (shortcut key ‘M’), click on a starting area and drag the curser outwards to create a selection. Holding the Shift key while creating the selection locks the aspect ratio to that of a square (holding the shift key with the oval Marquee creates a circle). The Lasso Tool (shortcut key L) on the other hand provides a freehand selection technique. Click on the image and drag the curser around as if you are drawing with a pencil. In this way you can make irregular shaped selections around portions of the image. Really useful though is the Polygonal Lasso tool. Instead of drawing, you click to add a point and selection line is automatically drawn between the points. Double-clicking the mouse at the end closes the selection. The Magnetic Lasso tool works like the Polygonal Lasso tool but creates the points automatically by looking for areas of contrast as edges.
 |
| Click on the image to see the enlarged version with legible text |
The Magic Wand is a slightly different kind of selection. Useful to users starting out with Photoshop but one which I have come to avoid recently. The Wand selects all adjacent pixels of a similar value. When you click on a pixel, Photoshop searches around where you have clicked and adds all the other similar pixels to this selection. Here it is important to use the tool settings in the top bar above the stage (where the image sits). Sample size sets the target area that you actually click and determines what kind of pixel Photoshop must look for. Tolerance then sets how close to the selected sample the rest of the pixels must be. 0 means that the pixels that Photoshop selects must be absolutely identical (don’t expect to get much of a selection from this), while 100 is so vague that it selects all but the most obviously different pixels. Refine the tolerance based on how accurate you need the selection to be. Contiguous only allows Photoshop to look for pixels close to or connected to the selected pixel while Anti-Alias attempts to soften the edges of the selection so that you don’t get too many artificial-looking staircase effects in the final selection. The Auto Selection Tool (in the Magic Wand sub-menu) is a little like a brush that selects pixels. It uses a similar selection algorithm as the Magic Wand, but only where you opt to paint in the selection. So, the Magic Wand and Magic Selection tools are great for quick and dirty selections, but tend to lack finesse sadly.
 |
| Click on the image to see the enlarged version with legible text |
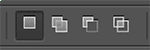 Importantly, one of the easiest ways to refine your selection is to add or remove portions of it. In the tool preferences bar above the stage there are a couple of small icons which mean: ‘add to selection’, ‘subtract from selection’ and ‘intersect selection’. You can also add to a selection by holding down the Shift button and then clicking and creating a new selection. Rather than replacing the original selection, this new selection is added to the original selection. In the same way holding down the Alt key while creating a new selection subtracts this selection from the original selection (Try this by first creating a rectangular selection, then while holding the Alt button create an oval selection within the rectangle - now the selected area is the rectangle minus the oval). Holding the Shift and Alt keys together while creating a new selection intersects this selection with the original selection. This means that the final selection is only the area where the two selections intersected. The Shift and Alt buttons get heavy use, but you can also simply use the icons on the tool preferences bar.
  Lastly there is the Quick Mask Mode (Q). This is the small icon at the bottom of the tools palette of a rectangle with a dotted circle inside. Clicking on this icon changes the image on the stage so that
it looks like a semi-opaque layer of red ink has been placed over it.
This allows you to create masks using the brush tools with all their
different controls. Wherever the image turns clear (i.e. no red color)
is where the selection is being made. Changing the opacity of the brush
still creates a selection, but now makes that selection semi-opaque. The
same applies to the feathering of the brush which acts in the same way
as feathering the actual selection (see above). When you click back to
normal view (click the icon or hit Q) the red layer disappears and is
replaced by the marching ants which indicate the selection.
Lastly there is the Quick Mask Mode (Q). This is the small icon at the bottom of the tools palette of a rectangle with a dotted circle inside. Clicking on this icon changes the image on the stage so that
it looks like a semi-opaque layer of red ink has been placed over it.
This allows you to create masks using the brush tools with all their
different controls. Wherever the image turns clear (i.e. no red color)
is where the selection is being made. Changing the opacity of the brush
still creates a selection, but now makes that selection semi-opaque. The
same applies to the feathering of the brush which acts in the same way
as feathering the actual selection (see above). When you click back to
normal view (click the icon or hit Q) the red layer disappears and is
replaced by the marching ants which indicate the selection. These are the most basic tools to work with when creating selections in Photoshop. Next month I’ll look at the Colour Selection tool and the Channels themselves in order to create self-feathering selections for natural looking adjustments.
No comments:
Post a Comment