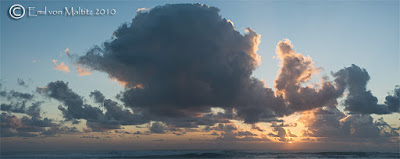
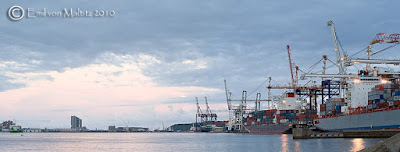
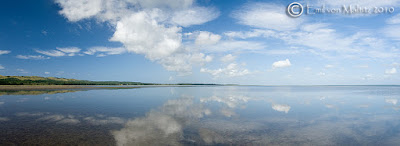
Saturday evening was the first, and very successful, micro-workshop that was held in Durban. Although the above image wasn't shot on the workshop (I was a tad busy teaching :)) it's representational of the kind of photographs that were being created by the workshop-goers (Many thanks to Claire, Melissa, Cheryl, Joan, Brian, Bev and Rose for joining me on the evening). They certainly had more than the photography to contend with, as passers-by were continually asking questions as to what they were up to. You can see them all hard at work in the grab shot on the right.
Low light photography tends to be somewhat daunting to beginner photographers, and even some amateurs who have been photographing for years. In reality, it is ridiculously easy. Twilight's the time to be out there with a camera and tripod! I will be running this workshop again in the future so stay tuned for further updates. I'll also have a tutorial on the website in the near future for some photographic bedtime reading.
Oh, and for anyone wanting a great twilight subject, the lighthouse at Umhlanga is fantastic! Lots of different colours all mingling together to make a kaleidoscope of your image.
About this Blog
Photo Writing is the web version of the Photo Writing mini-magazine produced by Limephoto and Emil von Maltitz since 2010. As of 2015 it is now completely online. Feel free to browse through the articles and please leave comments in the comments section if you would like to engage with us.
Monday, July 26, 2010
Tuesday, July 20, 2010
Photo Safari...in the Garden
One of the primary advantages of macro photography is the fact that you don't have to go very far to find something to photograph. In this case 2 metres from the front door was sufficient. Wildlife photograph photographers are constantly espousing the virtues of spending extended tim in the bush, getting to know both the area and the subjects. Well here's the wonderful thing about your garden. It doesn't cost a fortune to get there, you already pay the rates and your mortgage so you don't have to add anything else for your accommodation, fuel isn't necessary, and if the bugs arn't rocking up you can go inside and have a cup of coffee.
Monday, July 12, 2010
High Dynamic Range Images - Tonal Blending
In a previous article on blending high dynamic ranges images I looked at my personal favourite technique of simply creating large basic selections and blurring the edge of these selection masks to bring through broad areas of tonal value. When done carefully, this technique can mean for very natural looking images that still have tremendous tonal depth. The problem is that for some images these basic masks don’t work. For instance - image have very fine detail that also happen to have a very high tonal range. Here simple selections don’t work and the photographer has to resort to a more complex selection in order to single out shadows or highlights.
It is this style of imagery that the standalone programmes such as Photomatix excel at. Here the tonality of the various images is mapped out in their respective luminance values and then blended together according the range of tonal values that the photographer desires. This is one of the ways in which you can get that ‘HDR look’. I personally am not all that fond of this ‘look’ but recognise that it is a useful tool in the photographers box of tricks. Here is my approach to creating tonal mapped images without the dedicated software (although you will obviously need an editing suite like Photoshop, Elements, Gimp or Corel Paint).
To read the whole tutorial click through to the link on my site or cut and paste this URL: http://www.limephoto.co.za/HDR_2_tutorial.html
Please feel free to leave comments or suggestions on the article.
Friday, July 9, 2010
Getting High
In the literal sense of course. This last week I was busy shooting a large piece of machinery for the sugar industry, and had the interesting experience of trying to keep dead still at the upper end of a scissor lift while the camera remained open for some rather lengthy exposures. Hmmm, so much for using a tripod to keep the camera steady when the actual platform you are standing on sways like a mast on a ship! This was part of the fun in photographing the entanglement of pipes and rows of robust looking cylinders in a large warehouse just east of Durban.
Thursday, July 8, 2010
Lots and lots of pixels
A common misconception is that cameras need lots of pixels, huge amounts of pixels to produce good quality images. In a nutshell, that’s a lie. There’s far more at stake than simply megapixel count and a camera’s resolution. I’ll get into that in more detail in a future tutorial, but for the moment I want to point out a very simple technique that can get you plenty of pixels to play with – stitching. There are a an amazing array of programmes available to stitch images together to create wonderful panoramas, or simply files with more detail in them. You can take a look at the gigapan project for instance where photographers around the world are capturing these massively detailed images by stitching literally hundreds of images together for a single image.
Such massive detail isn’t always necessary. The gigapan project is really designed to be viewed on a computer screen where you can zoom into a tiny detail. For the vast majority of photographers, the end goal is rather a displayed print that can be scrutinized at close range (theoretically the optimum viewing distance of an image is the same as the diagonal of the print in question, ergo an 8x10” print is optimally viewed at 12.8” from the print). The problem for landscape and other fine art photographers is that the nature of the image is such that the viewer will want - indeed is enticed by the subject matter itself – to peer closer into the frame. This of course means that many photographers end up chasing yet greater resolution. Here’s the cheap fix: learn to use Photoshop’s truly excellent panoramic stitching feature, or alternatively invest in one of many panoramic stitching programmes that are available.
If you really want to go the whole hog you can also invest in a panoramic head. These cost a lot but ensure that you get perfect alignment between the images that are to be stitched. Tilt/Shift lenses also work beautifully, but are rather more expensive than a shifting lens. I have long list of tutorials that are currently being written, but will add a detailed how-to on shooting and stitching panoramic images in the near future.
Friday, July 2, 2010
Dearly Beloved...
We are gathered here to mourn the loss of our dear friend, the Nikkor 18-35mm f3.5-5.6. It shall be sorely missed. Yup, when camera bits break, they go in a big way. In this case my most used lens smacked rather hard against an unyielding surface while attached to a heavy D700 and even heavier aluminium tripod. All that combined weight ensured that the lens did a rather impressive show of shearing into two at the aperture ring. So now the hunt begins for a replacement. The options are a second-hand 17-35mm f2.8, another 18-35mm or the newly announced 16-35mm f4. Odds are in favour of the 16-35mm depending on earnest discussions that have yet to take place with Mr Credit Card.
Apart from the shattering experience that my equipment went through, the rest endured the usual sandy blast of wind, sea spray and the occasional downpour of rain that have come to mark my monthly workshop in St Lucia. A lively bunch of students from Germany, the UK and the Netherlands kept me on my toes and theirs wet while we visited my usual photographic haunts around St Lucia and the iSimangaliso Wetland Park. The images that they produced after three days of intensive workshop were truly impressive. I get this fantastic kick every time I see the improvement that students have from a workshop. Maybe the learning experience has something to do with it, but the simple act of surrounding oneself with photography, the act, the thinking and the discussion of, ensures that photographic inspiration is piqued.
Regular readers of the blog will know that last month was crazy for me. A workshop in St Lucia was followed in short order by a landscape tour of the Amphitheatre which in turn was succeeded by a fantastic intermediate photography workshop in the Witteberge and Southern Drakensberg mountains around Barkly East. A last gasp shoot of some Sony conference delegates while being jostled and bunched at the end of a pier toward the dying light of day completed the month so to speak. July, although potentially more restful will certainly have its moments of frenetic activity. I’ll write shortly about an upcoming industrial shoot in which I’m intending on using painting with light as a primary technique. I’m also hoping to get out a tutorial on tonal mapping (as per special request). Become a follower or sign up via this blog’s RSS feed to keep track.
Thanks to Lorraine, Donny, Paul and Tine for a great week of photography! I look forward to seeing further great work.
Subscribe to:
Posts (Atom)