I found myself on a photoshoot a few weeks back without my lighting gels. The horror, the brief moment of panic. Not my finest moment admittedly. However, there is a very simple fix in Photoshop that probably does an even better job than using gels in the first place.
To start with, not every photographer uses gels, or even knows what they are, although they were commonplace and essential in the days of film. Basically a gel is a thin sheet of transparent material coloured to a particular hue. Light comes in various colours from the warm hue of dawn and candle-light through to the cool hues of LEDs and deep shade. Our eyes adjust for these shifts in colour, but the camera doesn't do this quite as effectively. The answer is to use gels and filters to overcome the linear response to light that our cameras have.
Flash light is supposed to be balanced to the same colour as daylight (actually technically known as photographic daylight). In reality though, all different flashes have slightly different colours. I have noticed my Godox flashes shoot bluer than my Nikon strobes and my Elinchrom studio lights warmer. By adding a thin gel to a light we are able to change the colour of that light so that it better matches (or doesn't at all) the other light sources in the scene.
The image I needed to shoot was of a business owner above the food packing facility of his. The walkway we used was in the shadow and needed to be lit, which I did using a Nikon Sb910 bounced into the ceiling and wall behind me while an SB600 gave a separating highlight. The problem is that the ambient light in the background was from ugly halogen lights with a strong orange caste. Ordinarily I would have gelled my flashes to balance with the ambient, but I didn't have gels.
 |
| The same image with two different white balances applied; left for the background and right for the face. |
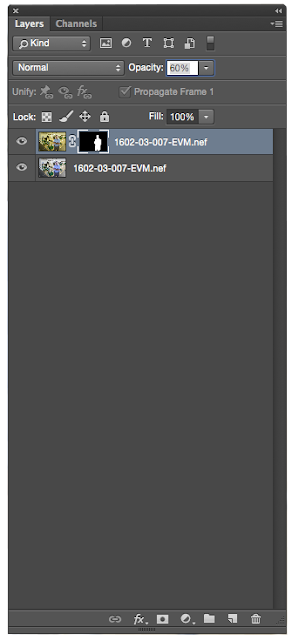
 The answer is really simple. Shoot normally with the lights at their obviously different colours. Once back in front of the computer, create a virtual copy (I used Lightroom CC) and set the white balance on each of the two images. I set a white balance for the model on the one image and a white balance for the background ambient light on the other. Open these images as layers in Photoshop.
Once in Photoshop, drag the layer with the model on to the top of the layer stack (if it isn't there already). Now add a mask and make sure that the mask is inverted by hitting Cmd + I (just make sure that the mask is all black). Now using a brush paint white ink on the mask to match the model. Effectively what you are doing is painting the correct white balance onto him, which is different to the white balance for the background. If you find the effect too strong you can adjust the opacity of the layer to taste.
That's it. If you are in a rush, save and complete the rest of the work in Lightroom, or continue on in Photoshop with the rest of the retouch. I still feel that gels are the better option for controlling the colour of light, particularly if you have multiple strobes in the scene. As a quick fix though, layering different white-balanced versions and masking through, is an elegant and simple solution to a relatively complex problem.
 |
| My very simple and quickly drawn mask |


No comments:
Post a Comment